Reading Rapids
Introduction
To really progress in running whitewater, you need to develop solid rapid reading skills. Proper reading of rapids enables the paddler to safely and efficiently navigate their way downstream. Most beginner paddlers look a short distance in front of their boats. They worry about the minor features and often lose sight of major obstacles further downstream until it is too late. As they gain more experience and comfort in their boat, their field of vision increases. Many novice and intermediate paddlers are in a hurry to "step it up". They often follow other paddlers down rapids instead of reading and taking their own lines. This is a really bad habit to get into. If the person in front of you has to stop suddenly or flips, you no longer have someone to follow. Try to chart your own course or at least figure out why certain lines are better than others.
The Downstream V
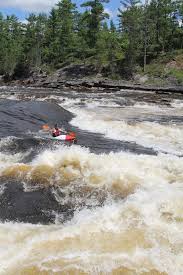 Rapids are formed by water running over and around rocks and ledges. The most basic feature is the downstream V that develops when water runs between two rocks. This feature is also known as a tongue. Generally, this is what you want to aim for.
The Upstream V
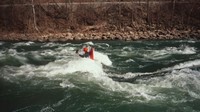
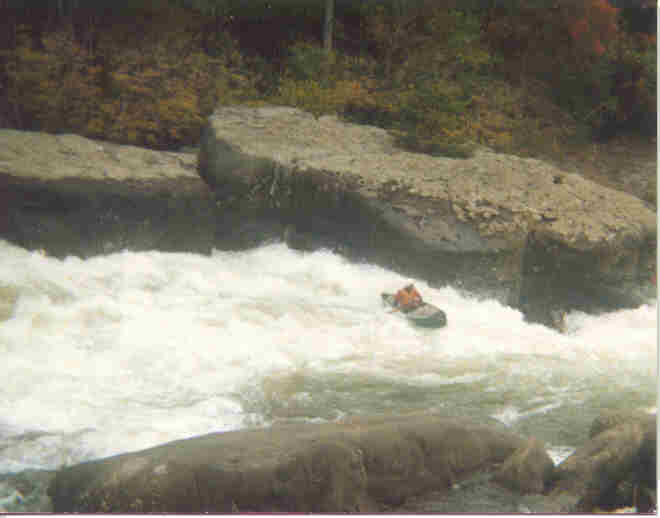
The opposite of this feature is an upstream V. In an upstream V, water rushes around a rock. In the previous picture, you can clearly see two upstream V's. In general, we try to avoid upstream V's or at least lean into the rock to avoid capsizing.
The Horizon Line
 A horizon line often denotes the beginning of a steep drop or ledge. If the rapid is known to be safe, I like to cautiously paddle to the middle of the river to get a better look. You can use your back ferry or draw strokes to move laterally to line up for the best position to start the drop. If you can find an eddy close to the ledge, go catch it and get a better look from your boat.
Waves
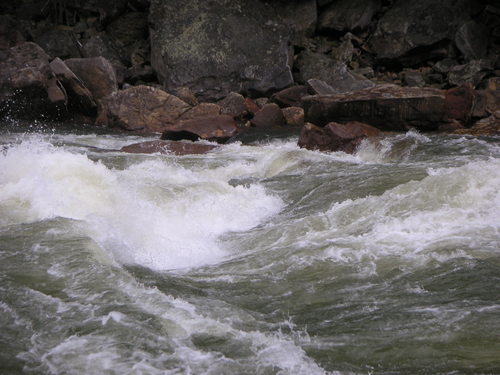
 Waves come in many shapes and sizes.
As a general rule, they are very safe and a lot of fun. A wave train is simple a series of waves. A good approach is to hit the waves head on and simply paddle over top of them. You can easily scout at the crest of each wave and turning at wave tops is real easy as well.
Holes
 Holes, reversals, souse holes, and stoppers are synonyms. They are formed when water drops over a ledge or boulder and the water downstream of the obstacle rushes back up stream to fill in the void. When you first start paddling, you want to avoid these features. As you gain more skills and become an advanced paddler, you will often use holes as eddy alternatives, for play time, or for quickly crossing a river. Holes come in all shapes and sizes and are sometimes quite challenging to read. River wide holes that are perfectly uniform are typically created by a manmade structure like a dam - these should almost always be avoided as they can be death traps. Here is a video of Swimmers Hole on the Lower Yough: Lower Yough Swimmers Hole.
Eddies
 Eddies are your friend! All good boaters catch eddies and use them to control their descent downstream. A good rule of thumb in paddling is to never leave an eddy until the coast is clear from above and you can see how to reach an eddy below. Here is an excellent diagram of an eddy.
Pillows
 Another river feature you will certainly encounter is a pillow. This feature is caused by water piling up on a boulder. As will all rocks, you generally lean towards them to lift the upstream edge of your boat out of the water. Here is an excellent example from the Gauley called Pillow Rock.
River Bends
When current flows around a bend in a river, it flows much faster and deeper on the outside of the bend. The velocity and depth on the inside of a river bend is much slower and shallower. You can use this to your advantage by sneaking on the inside and eventually moving more towards the center when you feel comfortable.
Further Resources
The following vuideo from Eric Jackson does a great job in explaining River Hydrology: River Reading. This is another fun video: Reading Whitewater.
A shorter article on river reading with great diagrams is: River Reading Article.
I also highly recommend William Nealy's KAYAK book. This book does an excellent job of describing river reading in depth and is absolutely hilarious. Here it is on Amazon.com: William Neely's Kayak Book.
Appropriately apply hydrology to site selection and to all in-water modules
A major challenge in teaching SWR is site selection. We have a great deal of topics to cover and often need a wide variety of features. We also need deep water features to avoid banging up ourselves and our students. Rivers change on a daily basis (unless they are dam released). As instructors, you will need to choose your sites carefully to maximize teaching opportunities and safety. This skill needs to be demonstrated throughout the class.
Create effective teaching modules using blackboards, handouts, sand tables, video, etc., as well as using natural features while alongside a river
Sometimes teaching can be a real challenge. There are numerous water features we would like to talk about and demonstrate but it is a rare site indeed with all of these features. If teaching indoors, your task is far easier. You can certainly collect a whole bunch of pictures and video and piece together in a PowerPoint presentation. Blackboards (or more current - dry erase boards) make it easy to diagram eddies, holes, falls, etc. All instructors should prepare some form of handouts. Handouts are definitely a key sign of a professional instructor and for good reason - students have something tangible they can refer back to later on.
When outdoors, you need to be far more creative. If you have a sandy beach, you have a ready made blackboard. A small stream maybe a foot wide is a miniature class V whitewater run. Here is a great example using foamie kayakers: Whiplash Falls. It is often easier to show sieves and foot entrapments in these small streams (and certainly a great deal safer as well). You can even move rocks around to make the water feature you wish to demonstrate.
Foot entrapment risks
Foot Entrapment - A foot entrapment is very serious. Water is very powerful and will win eventually. This is why we teach new paddlers to keep their feet on the surface and try not to stand in fast water above your knees in depth. Here is a nice explanation on how to avoid a foot entrapment and other defensive swim techniques: Foot Entrapment
Foot entrapment rescues can be really dangerous. A combination of a stabilization and snag lines may avoid a hands on rescue but this is very tricky to pull off, especially the weighted snag line. Most of the time, someone needs to go out to the victim. Be very careful with footing so you don't fall into the same trap. Use a rescue vest and secure a line to your tether as an extra safety precaution. Stir the bottom with your un-weighted foot to find the next safe place to plant your foot. If it grabs it should be easy to pull back out. Once you make it to the victim, you should be able to pull out an entrapped foot fairly easily. To unpin a boat, have someone hold the victim's body to stabilize and try to back out the boat or loosen one end depending on the pin.
Entrapment can be avoided by staying away from strainers, sieves, undercuts, and proper swimming techniques if you come out of your boat. Don't try to stand in fast current above your knees, chances are you will get swept downstream out of control. If you have an older boat, make certain the walls are very secure so it is unlikely to collapse. When purchasing a boat, make certain it has a full bulk head for your feet instead of foot pegs that were common on older boats. Make certain throw ropes are stored properly and carry a rescue knife in an easy to get at position on or in your PFD. Just like skiing, stay in control. If the run is too difficult, portage the tough rapids or walk out if necessary.
Page 1 of 4
- You are here:
-
Home

- Hazards and Hydrology Training Material