Two point anchors
With more marginal anchors like brush and smaller rocks, you often need multiple anchors attached to a single carabineer or pulley - basically spreading the load. In this situation, try to avoid a vector pull which would really stress the carabineer. Keep the angle of pull from each anchor less than 90°. With multi-point loads, add a twist on one of the lines of webbing and hook the carabineer through to for a self-equalizing loop. Always consider what will happen if the loads moves (like the boat coming free). Will your anchor fail? Add an independent tag line for this possibility.
Here are two nice videos that demonstrate the concepts of load sharing versus load distributing multi-point anchor systems:
One point anchors
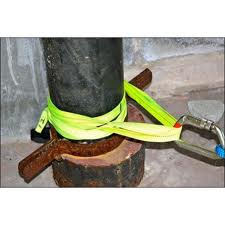
 When setting an anchor on a tree trunk, a simple tension-less knot ("No-Knot") is ideal. Simply wrap the rope around the tree 3 or 4 times and attach the end loosely with a carabineer. This is very strong and maintains nearly 100% of the rope strength. Ropes maintain nearly all of their strength when pulled in nearly a straight line or a very wide arc. Knots create a tight bend and this reduces breaking strength considerably, sometimes as much as 50%. The holding power of simple friction is absolutely amazing. The common eye-splice used on boat ropes is a great example. If the system is failing, you will see the rope slipping. If you need to ditch the anchor, simply unhook the carabineer and unwrap. This is easy since there is no stress on a knot.
You could also create a simple loop like a figure 8 on a bight. With a loop or multiple wraps, leave enough slack to reduce the angle of pull on the carabineer to less than 90°. This greatly reduces the stress on a carabineer.
General concepts
Some tricks of the trade are setting anchors as close to the ground as possible. Use padding and avoid friction wherever possible. Favor decent sized pulleys over carabineers for change of direction or as the traveling pulley. A good rule of thumb is the pulley needs to avoid bending the rope in a loop less than a 4:1 turning radius. A 2" pulley is perfect for a 3/8" hauling line. Adding an extra pulley to avoid running the rope over a shelf edge of rock is always a wise precaution. Anchors fail sometimes, often due to shifting loads. Try to predict where projectiles will fly and take precautions. Always wear your safety gear.
When setting a two anchor point system, remember how a vector pull works. That real skinny person can easily topple two really big persons when the line is taught (180°) by pulling in the middle of the rope. Reduce the angle to 45° and you have an even match. Try to make the angle of pull on the anchors 90° or less.
Beware of rubbing any of your soft lines over a hard surface like a rock. The rock will act like sandpaper and eventually wear out the line (or worse yet - cut it). When confronted with this challenge, try padding with some clothing or better yet, add an extra pulley to avoid this contact. A more subtle example is a carabineer with somewhat sharp edges. A major advantage of a pulley over a carabineer is greatly reduced friction. Friction not only causes wear, it can add a great deal of heat and this can be a real concern with Polypropylene line which has a low melting point.
Here is a nice video on padding anchors and how to select good anchor points: Padding Anchors.
Page 2 of 3
